
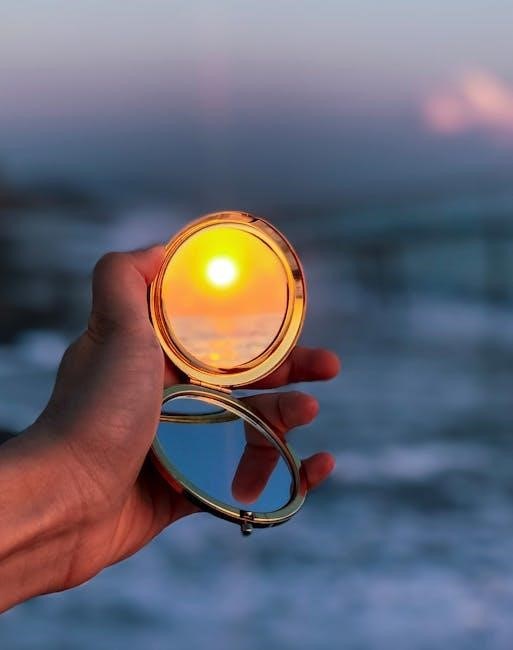
The golden hour, often called the “magic hour,” is a photographer’s dream. It occurs during the first hour after sunrise and the last hour before sunset, offering soft, warm light that enhances images. This period is ideal for capturing stunning photos with golden hues and gentle illumination. A golden hour PDF guide provides tips, techniques, and insights to help photographers make the most of this magical time, ensuring they never miss the perfect shot.
Definition and Significance in Photography
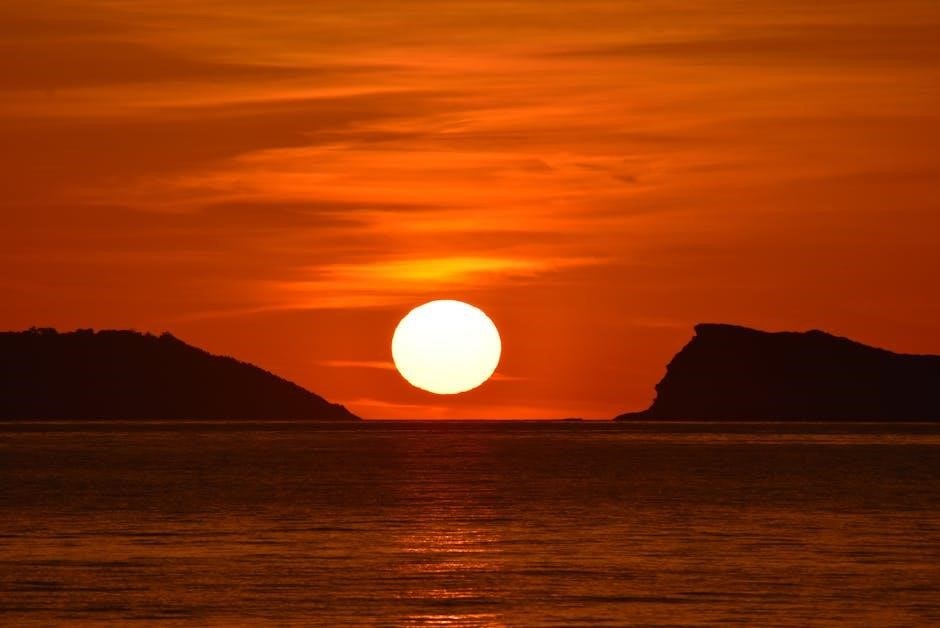
The golden hour is the captivating period shortly after sunrise and before sunset when the sun’s light transforms into a soft, warm glow. Often referred to as the “magic hour,” this time frame is cherished by photographers for its unique light quality. During the golden hour, the sun is low on the horizon, casting long shadows and imbuing scenes with a rich, golden color palette. This light is less harsh than midday sunlight, reducing unwanted shadows and enhancing the overall ambiance of images. The golden hour is particularly prized in photography due to its ability to create a dreamy, ethereal atmosphere, making it ideal for portraits, landscapes, and urban photography.
The significance of the golden hour lies in its versatility and aesthetic appeal. Photographers often plan their shoots around this time to capitalize on the flattering light, which adds depth and warmth to their subjects. The golden hour is also a popular topic in photography guides, with many resources, such as golden hour PDF tutorials, offering tips on how to best capture its beauty. Whether you’re a professional or an amateur, understanding and utilizing the golden hour can elevate your photography to new heights. Its magical light has become a cornerstone of creative expression in the world of photography.
The Science of the Golden Hour
The golden hour occurs when the sun is low on the horizon, causing light to scatter through Earth’s atmosphere. This scattering filters out shorter wavelengths, leaving warm, golden tones. The sun’s angle creates soft, diffused light with minimal shadows, enhancing the environment’s natural beauty. A golden hour PDF explains this phenomenon in detail.
Understanding the Sun’s Position and Light Scattering
The golden hour is deeply tied to the sun’s position and how light interacts with Earth’s atmosphere. During this period, the sun is low on the horizon, typically 1-6 degrees above the horizon, causing sunlight to travel through a greater distance in the atmosphere. This extended path leads to increased scattering of shorter wavelengths, such as blue and violet, due to Rayleigh scattering. As a result, longer wavelengths like red, orange, and yellow dominate, creating the signature warm tones of the golden hour.
The scattering effect is amplified by atmospheric conditions, including pollution, dust, and water vapor, which can enhance the vibrancy of the golden hues. The sun’s angle also reduces the intensity of direct light, minimizing harsh shadows and creating a soft, diffused illumination ideal for photography. This phenomenon is consistent worldwide but varies in duration based on latitude and time of year. For example, near the equator, the golden hour is shorter, while at higher latitudes, it can last significantly longer.
A golden hour PDF often includes diagrams and charts to illustrate the sun’s position and light scattering principles, helping photographers understand and predict this magical time. These resources highlight how the sun’s low angle and atmospheric interactions create the perfect conditions for capturing stunning images with warm, golden light.
Best Practices for Golden Hour Photography
Mastering the golden hour requires preparation and adaptability. Arrive early to scout locations, as timing is critical. Use a tripod for stability in low light and experiment with silhouettes to add depth. Shoot in RAW to capture maximum detail and adjust white balance for accurate color representation.
- Plan ahead with apps to track golden hour timing.
- Be flexible to changing light conditions.
- Focus on composition to emphasize the golden hues.
Tips on Timing and Location Scouting
Timing and location scouting are essential for capturing stunning golden hour shots. Use apps like Sunset Time or Photopills to track the exact golden hour window, which varies by location and season. Arrive early to survey your location, ensuring it aligns with the sun’s trajectory.
Scout locations with distinct features like horizons, water, or architecture to maximize the golden light. Elevated spots often offer better views, while low-lying areas can create dramatic silhouettes. Consider the direction of the sun relative to your subject to avoid harsh backlight or unwanted shadows.
Weather plays a significant role; clear skies produce vivid hues, while clouds can soften or diffuse the light; Be prepared for rapid changes in illumination, as the golden hour lasts only 60 minutes. Keep a backup location in case of unexpected conditions like fog or overcast skies.
Plan your shots in advance, visualizing how the light will interact with your surroundings. Flexibility is key, as the best moments often arise unexpectedly. By combining precise timing with thoughtful location scouting, you can unlock the full potential of the golden hour in your photography.
Optimal Camera Settings for Golden Hour
Mastering camera settings during the golden hour is crucial for capturing its unique beauty. Start with a low ISO, ideally between 100-400, to minimize noise and retain sharpness. Use manual mode or aperture priority to control depth of field, with apertures like f/5.6 to f/8 for landscapes or f/2.8 to f/4 for portraits.
Adjust your white balance to “Cloudy” or “Shade” to enhance the warm tones of the golden hour. Experiment with shutter speeds between 1/30s to 1/125s to create motion blur in clouds or water while keeping subjects sharp. For dynamic range, enable bracketing or shoot in RAW format to capture more detail in highlights and shadows.
Focus on your subject using manual focus or continuous AF for moving subjects like wildlife or people. Avoid overexposing the sky by using a graduated neutral density (ND) filter or adjusting your composition. Finally, review your shots and adjust settings as the light changes rapidly during this period.
By fine-tuning these settings, you can harness the golden hour’s magical light to create stunning, professional-grade images that stand out.
Composition Techniques During the Golden Hour
The golden hour offers a unique opportunity to create visually stunning compositions. Start by using leading lines, such as roads, shorelines, or fences, to guide the viewer’s eye toward the subject. The soft, warm light enhances textures and shapes, making it ideal for capturing silhouettes of objects or people against the vibrant sky.
Experiment with negative space by placing subjects in front of the glowing horizon, allowing the sky to dominate the frame. This creates a sense of simplicity and emphasizes the beauty of the golden hour. Incorporate framing elements like archways, trees, or buildings to add depth and context to your images.
Take advantage of reflections in water, glass, or metal surfaces to mirror the warm tones of the environment. Symmetry is another powerful tool, especially in urban or natural landscapes with repeating patterns. Don’t forget to include foreground interest, such as flowers, rocks, or grass, to add layers to your composition.
Finally, experiment with angles and perspectives. Shoot from a low or high vantage point to add drama, or capture the scene in a panoramic format to showcase the vastness of the setting. By balancing these elements, you can create captivating and emotionally engaging golden hour photographs.
Golden Hour in Various Photography Genres
The golden hour enhances various photography genres, from landscapes to portraits, urban scenes, and wildlife, by adding warm tones and soft light. This period offers unique opportunities to capture stunning images, blending natural beauty with creative compositions. Understanding how to utilize the golden hour in different genres can elevate your photography.
Landscapes and Nature Photography
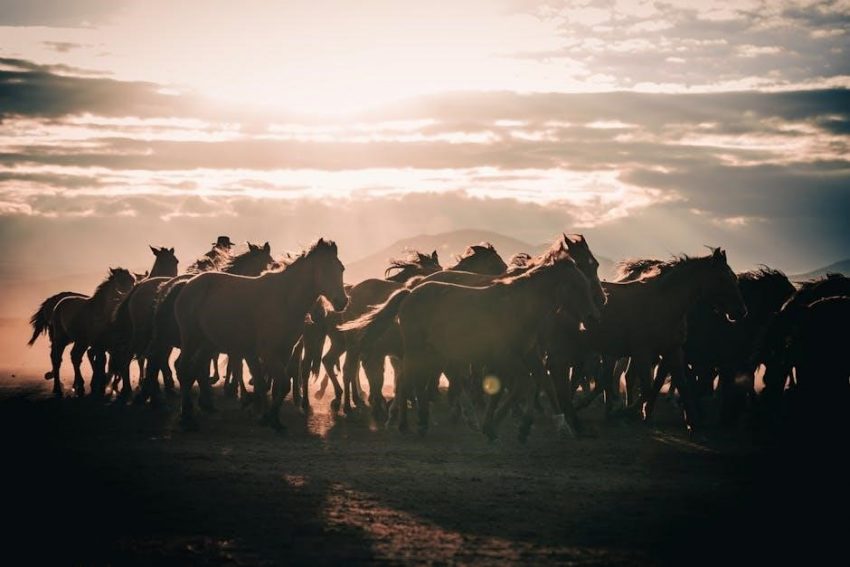
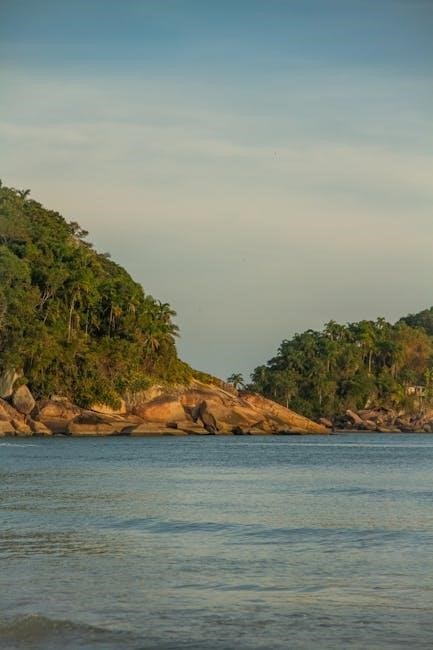
The golden hour is a magical time for landscape and nature photography, offering soft, warm light that enhances natural elements. During this period, the sun’s low position creates long shadows, adding depth to scenes, while the golden hues bring out vibrant colors in mountains, forests, and water. Wildlife becomes more active, and the overall atmosphere is serene, making it ideal for capturing dramatic and peaceful imagery.
- Timing is Key: The golden hour occurs twice a day, shortly after sunrise and before sunset. For landscapes, sunrise often provides calm conditions with mist and fog, while sunset adds dynamic skies and reflections.
- Location Scouting: Look for locations with open horizons, such as coastlines, valleys, or mountainous regions, where the golden light can illuminate the scene effectively. Foreground elements like rocks, trees, or water add interest to compositions.
- Camera Settings: Use a low ISO (100-400) and a wide aperture (f/8-f/11) to ensure sharpness across the frame. A tripod is essential for stability, especially in low-light conditions. Graduated neutral density (ND) filters can balance the exposure between the bright sky and darker foreground.
- Composition Tips: Incorporate leading lines, such as rivers or paths, to guide the viewer’s eye. Reflections in water or wet surfaces can mirror the golden colors, while silhouettes of trees or wildlife add depth and contrast.
Golden hour landscapes often evoke a sense of tranquility and grandeur. By mastering the timing, location, and technical aspects, photographers can capture the unique beauty of nature during this fleeting period, creating images that inspire and connect with viewers on an emotional level.
Portraits and Fashion Photography
The golden hour is a coveted time for portrait and fashion photography, offering soft, warm light that flatters skin tones and enhances textures. Unlike the harsh midday sun, the golden hour provides gentle illumination, minimizing unflattering shadows and highlights. This makes it ideal for creating elegant, romantic, or dramatic imagery.
- Timing and Location Scouting: The golden hour occurs shortly after sunrise and before sunset. For portraits, the evening golden hour is often preferred, as it provides a warm, romantic ambiance. Scout locations with open spaces, such as parks or beaches, where the golden light can illuminate your subject evenly.
- Camera Settings: Use a low ISO (100-400) and an aperture that creates a shallow depth of field (f/2.8-f/5.6) to isolate your subject. A tripod can help stabilize your camera in low-light conditions, ensuring sharp images.
- Composition: The golden hour’s soft light and long shadows add depth to portraits. Position your subject so the light hits them at a 45-degree angle to create dynamic, flattering results. Incorporate natural elements like trees or water for added context.
- Fashion Photography: The golden hour is perfect for capturing high-fashion looks. The soft light wraps around the subject, highlighting textures and details in clothing. Use reflectors to bounce light onto the subject’s face or attire for a polished look.
The golden hour’s warm tones complement the colors of outfits, creating harmonious and stylish images. By leveraging this magical lighting, photographers can produce stunning, professional portraits and fashion shots that stand out.

Urban and Street Photography
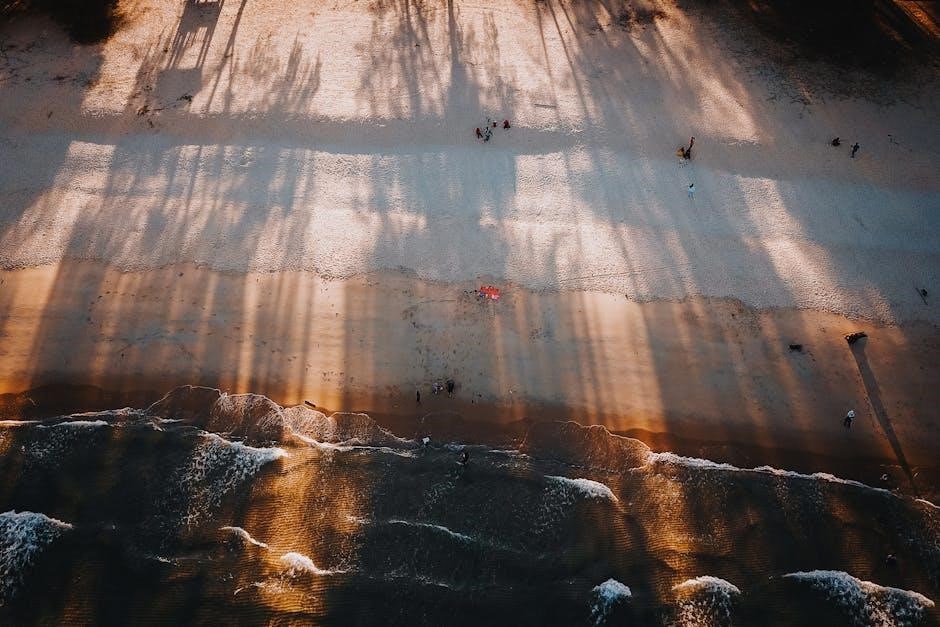
The golden hour transforms urban and street photography, infusing cityscapes with a warm, dynamic ambiance. During this time, the soft, diffused light highlights textures, shadows, and reflections, creating visually compelling scenes. Skyscrapers, streets, and urban elements take on a magical quality, making the golden hour a prime time for capturing the essence of city life.
- Light and Shadows: The golden hour’s low-angle light casts long shadows, adding depth and drama to urban scenes. This is ideal for capturing the interplay between light and architecture, as well as the vibrant colors of neon signs and streetlights beginning to flicker on.
- Street Life: The golden hour offers a unique opportunity to document people in their natural environments. The warm light softens faces and highlights movements, making it easier to capture candid, storytelling moments in bustling urban settings.
- Composition Tips: Use the golden hour to experiment with reflections in windows and puddles, or to frame subjects against the vibrant sky. The soft light also reduces harsh contrasts, allowing for better detail in both highlights and shadows.
- Equipment: A tripod can be helpful for stabilizing shots in low light, while a wide-angle lens is great for capturing broad cityscapes. Don’t hesitate to raise your ISO slightly to freeze motion in dynamic street scenes.
The golden hour’s warm tones and unique lighting make it a perfect time to explore urban and street photography, blending the beauty of the city with the magic of natural light.
Wildlife and Action Photography
The golden hour presents a unique opportunity for wildlife and action photography, offering soft, diffused light that enhances textures and reduces harsh shadows. This period is ideal for capturing the natural behaviors of animals in their habitats, as the warm tones create a serene and authentic atmosphere.
- Golden Hour Light: The soft, golden light during this time minimizes unflattering shadows, allowing for more detailed captures of fur, feathers, and other textures. It also adds a dramatic backdrop for action shots, such as animals in motion or birds in flight.
- Action Photography Tips: Use faster shutter speeds to freeze the motion of wildlife, while slower speeds can create a sense of movement and blur. The golden hour’s warm light can highlight dust, water, or other environmental elements, adding depth to action scenes.
- Camera Settings: A lower aperture (like f/2.8) can help isolate subjects, while a faster shutter speed (1/1000th of a second or higher) is ideal for capturing sharp images of moving animals. Adjust your ISO based on lighting conditions to avoid noise.
- Timing and Patience: The golden hour’s brief duration requires precise timing. Anticipate animal behavior, such as peak activity times, to maximize your chances of capturing compelling shots. Be prepared to adapt to changing light conditions quickly.
- Lens Choice: A telephoto lens (70-200mm or 100-400mm) is essential for wildlife photography, allowing you to maintain a safe distance while capturing intimate moments. For action shots, consider a wide-angle lens to emphasize the environment and movement.
The golden hour is a magical time for wildlife and action photography, blending stunning light with the dynamic energy of nature. By mastering timing, technique, and equipment, photographers can create unforgettable images that stand out.
Post-Processing Golden Hour Photos
Post-processing is crucial to enhance golden hour images. Adjust exposure, contrast, and color balance to maintain natural tones. Use tools like Lightroom or Photoshop to refine details, ensuring the warm hues and soft light remain intact. Proper editing elevates the photo’s emotional impact and preserves its artistic essence.
Enhancing Colors and Contrast
Post-processing is a critical step in maximizing the beauty of golden hour photos. Start by adjusting the white balance to ensure natural tones, as the golden hour often introduces warm hues. Use the color grading tools in Lightroom or Photoshop to enhance the vibrant oranges, yellows, and pinks while maintaining a balanced palette.
- Adjust the exposure and contrast to add depth, ensuring the highlights and shadows are well-defined without overexposing the image.
- Use the tone curve to refine the luminosity of colors, emphasizing the warm tones of the golden hour while preserving detail in darker areas.
- Apply selective color adjustments to enhance specific hues, such as boosting oranges or yellows to make the scene more vivid.
- Experiment with HDR techniques to merge multiple exposures, capturing the full dynamic range of the golden hour light.
Remember, subtle adjustments are key. Over-editing can make the image look unnatural. Pay attention to local adjustments, such as brushing or gradient filters, to refine specific areas like the sky or foreground. By thoughtfully enhancing colors and contrast, you can create a stunning, professional-grade golden hour image that captivates the viewer.
Using HDR for Optimal Results
High Dynamic Range (HDR) photography is a powerful technique to capture the full range of tonal values during the golden hour. This method is particularly effective when shooting scenes with both bright skies and darker foregrounds, as it combines multiple exposures into a single image with enhanced detail and depth.
- Capture a series of bracketed exposures (e.g., -2, 0, +2 EV) to cover the full dynamic range of the scene. A tripod is essential to ensure alignment between shots.
- Use HDR software like Adobe Photoshop, Lightroom, or dedicated tools like HDRSoft to merge the exposures. These tools automatically align and blend the images, preserving detail in both highlights and shadows.
- Adjust the HDR settings carefully to avoid an overly surreal or artificial look. The goal is to create a natural representation of the scene while maximizing detail.
- Pay attention to ghosting artifacts, which can occur when elements like trees or clouds move between exposures. Most HDR software offers tools to minimize these effects.
- Once merged, further refine the image by adjusting contrast, highlights, and shadows to enhance the golden hour’s warm tones without overprocessing.
By leveraging HDR, photographers can achieve a more lifelike representation of the golden hour’s dramatic light, ensuring that both the sky and foreground are perfectly exposed and detailed.
Golden Hour PDF Guide
This comprehensive guide provides detailed insights into mastering the golden hour, including timing, location tips, and camera settings. It’s designed for photographers of all levels, offering practical advice to elevate your golden hour photography and capture stunning images with ease and creativity.
What to Include in Your Guide
Your Golden Hour PDF guide should be a comprehensive resource, covering essential tips, techniques, and insights for photographers. Start with a clear introduction to the golden hour, explaining its significance and why it’s a favorite among photographers. Include practical sections on timing, such as how to calculate the golden hour for any location and time of year.
- Location Scouting: Provide tips on finding the best spots for golden hour photography, including how to use apps or tools for planning.
- Camera Settings: Offer detailed advice on ISO, aperture, and shutter speed adjustments to capture the soft, warm light effectively.
- Composition: Share techniques for framing shots, such as using silhouettes, reflections, or leading lines to enhance golden hour scenes.
- Post-Processing: Include guidance on editing golden hour photos, such as enhancing warm tones and adjusting contrast for dramatic results.
Consider adding checklists, diagrams, or example images to illustrate key points. A section on common mistakes to avoid during the golden hour can also be invaluable. Make sure the guide is visually appealing, with high-quality images and clear typography. Whether you’re targeting beginners or experienced photographers, ensure the content is accessible and actionable. This guide will serve as a go-to resource for anyone looking to master the art of golden hour photography.
Resources and Downloads
To help you master the art of golden hour photography, consider including a variety of resources and downloadable materials in your guide. Start by listing recommended websites, blogs, or YouTube channels that specialize in photography tips and golden hour techniques. Provide links to apps like The Photographer’s Ephemeris or Golden Hour Calculator, which help photographers predict and plan for the best shooting times.
- Workshops and Webinars: Include links to online workshops or webinars focused on golden hour photography. These can offer hands-on learning experiences for photographers of all skill levels.
- eBooks and Guides: Recommend other eBooks or PDF guides that complement your content, such as books on lighting, composition, or post-processing.
- Templates and Presets: Offer downloadable templates like golden hour shooting checklists or Lightroom presets specifically designed for enhancing golden hour photos.
- Community Resources: Share links to photography communities, forums, or social media groups where readers can share their work and get feedback.

Make sure to include a direct download link for your Golden Hour PDF guide, emphasizing its value as a comprehensive toolkit for photographers. Encourage readers to explore these resources to further refine their skills and stay inspired. By providing a wealth of actionable tools and connections, your guide becomes an indispensable resource for anyone passionate about capturing the beauty of the golden hour.